> ## Documentation Index
> Fetch the complete documentation index at: https://resend.com/docs/llms.txt
> Use this file to discover all available pages before exploring further.
# Create a receiving Webhook
> Learn how to create a webhook to respond to received emails with Resend.
## Configure Webhook
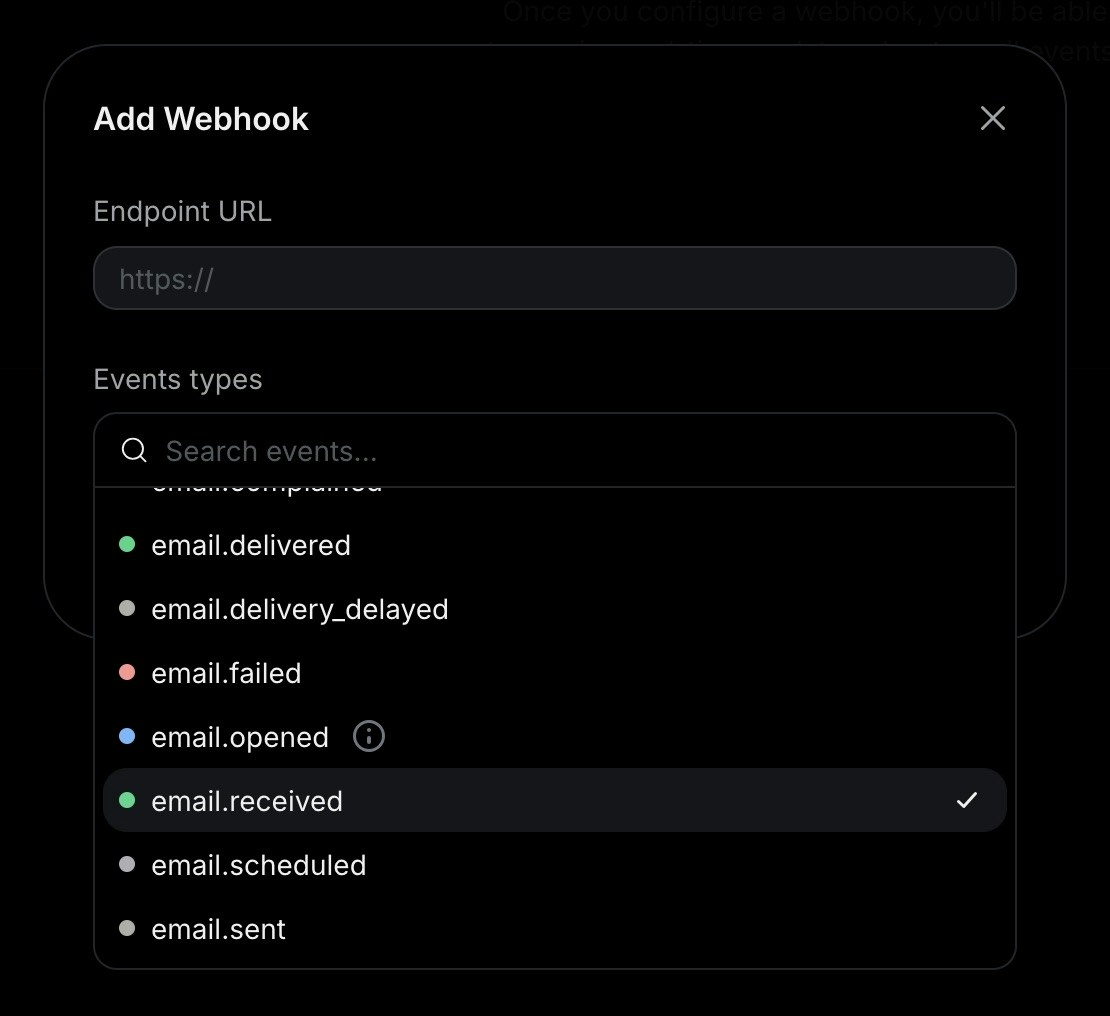
Once you can [receive emails](/docs/dashboard/receiving/introduction#quickstart), you can create a route to handle these emails in your application and configure an [`email.received` webhook](/docs/webhooks/emails/received) in your Dashboard.
Alternatively, you can use Resend's code tools to create your webhook from the [Webhooks API](/docs/api-reference/webhooks/create-webhook) or with a [webhook CLI command](/docs/cli#webhooks).
To configure your webhook in the Dashboard:
In your application, create a new route that can accept `POST` requests.
Here's how you can implement this:
```js Next.js theme={"theme":{"light":"github-light","dark":"vesper"}}
// app/api/events/route.ts
import type { NextRequest } from 'next/server';
import { NextResponse } from 'next/server';
export const POST = async (request: NextRequest) => {
const event = await request.json();
if (event.type === 'email.received') {
return NextResponse.json(event);
}
return NextResponse.json({});
};
```
```php Laravel theme={"theme":{"light":"github-light","dark":"vesper"}}
// routes/api.php
use Illuminate\Http\Request;
use Illuminate\Support\Facades\Route;
Route::post('/events', function (Request $request) {
$event = $request->json()->all();
if ($event['type'] === 'email.received') {
return response()->json($event);
}
return response()->json([]);
});
```
```php PHP theme={"theme":{"light":"github-light","dark":"vesper"}}
// index.php
header('Content-Type: application/json');
if ($_SERVER['REQUEST_METHOD'] !== 'POST') {
http_response_code(405);
echo json_encode(['error' => 'Method Not Allowed']);
exit;
}
$body = file_get_contents('php://input');
$event = json_decode($body, true);
if (json_last_error() !== JSON_ERROR_NONE) {
http_response_code(400);
echo json_encode(['error' => 'Invalid JSON']);
exit;
}
if ($event['type'] === 'email.received') {
echo json_encode($event);
exit;
}
echo json_encode([]);
```
```rust Rust theme={"theme":{"light":"github-light","dark":"vesper"}}
#[derive(Serialize)]
struct Empty {}
async fn example(Json(event): Json) -> Response {
if matches!(
event.r#type,
resend_rs::events::EmailEventType::EmailReceived
) {
Json(event).into_response()
} else {
Json(Empty {}).into_response()
}
}
```
Once you receive the email event, you can process the email body and attachments. You can also implement [webhook request verification](/docs/webhooks/verify-webhooks-requests) to secure your webhook endpoint.
Any email sent to any username at your receiving domain will be received
by Resend and forwarded to your webhook. You can intelligently route based
on the `to` field in the webhook event to create different workflows to
handle different inbound emails.
 For development, you can create a tunnel to your localhost server using a tool like
[ngrok](https://ngrok.com/download) or [VS Code Port Forwarding](https://code.visualstudio.com/docs/debugtest/port-forwarding). These tools serve your local dev environment at a public URL you can use to test your local webhook endpoint.
Example: `https://example123.ngrok.io/api/webhook`
Once you receive an email event, you can process the email body and attachments from the webhook payload.
```json theme={"theme":{"light":"github-light","dark":"vesper"}}
{
"type": "email.received",
"created_at": "2026-02-22T23:41:12.126Z",
"data": {
"email_id": "56761188-7520-42d8-8898-ff6fc54ce618",
"created_at": "2026-02-22T23:41:11.894Z",
"from": "onboarding@resend.dev",
"to": ["delivered@resend.dev"],
"bcc": [],
"cc": [],
"received_for": ["forwarded@example.com"],
"message_id": "<111-222-333@email.example.com>",
"subject": "Sending this example",
"attachments": [
{
"id": "2a0c9ce0-3112-4728-976e-47ddcd16a318",
"filename": "avatar.png",
"content_type": "image/png",
"content_disposition": "inline",
"content_id": "img001"
}
]
}
}
```
Webhooks do not include the email body, headers, or attachments, only their
metadata. You must call the [Received emails
API](/docs/api-reference/emails/retrieve-received-email) or the [Attachments
API](/docs/api-reference/emails/list-received-email-attachments) to retrieve them.
This design choice supports large attachments in serverless environments that
have limited request body sizes.
## API Reference
For complete API documentation, see the [Webhooks API reference](/docs/api-reference/webhooks/create-webhook).
For development, you can create a tunnel to your localhost server using a tool like
[ngrok](https://ngrok.com/download) or [VS Code Port Forwarding](https://code.visualstudio.com/docs/debugtest/port-forwarding). These tools serve your local dev environment at a public URL you can use to test your local webhook endpoint.
Example: `https://example123.ngrok.io/api/webhook`
Once you receive an email event, you can process the email body and attachments from the webhook payload.
```json theme={"theme":{"light":"github-light","dark":"vesper"}}
{
"type": "email.received",
"created_at": "2026-02-22T23:41:12.126Z",
"data": {
"email_id": "56761188-7520-42d8-8898-ff6fc54ce618",
"created_at": "2026-02-22T23:41:11.894Z",
"from": "onboarding@resend.dev",
"to": ["delivered@resend.dev"],
"bcc": [],
"cc": [],
"received_for": ["forwarded@example.com"],
"message_id": "<111-222-333@email.example.com>",
"subject": "Sending this example",
"attachments": [
{
"id": "2a0c9ce0-3112-4728-976e-47ddcd16a318",
"filename": "avatar.png",
"content_type": "image/png",
"content_disposition": "inline",
"content_id": "img001"
}
]
}
}
```
Webhooks do not include the email body, headers, or attachments, only their
metadata. You must call the [Received emails
API](/docs/api-reference/emails/retrieve-received-email) or the [Attachments
API](/docs/api-reference/emails/list-received-email-attachments) to retrieve them.
This design choice supports large attachments in serverless environments that
have limited request body sizes.
## API Reference
For complete API documentation, see the [Webhooks API reference](/docs/api-reference/webhooks/create-webhook).